


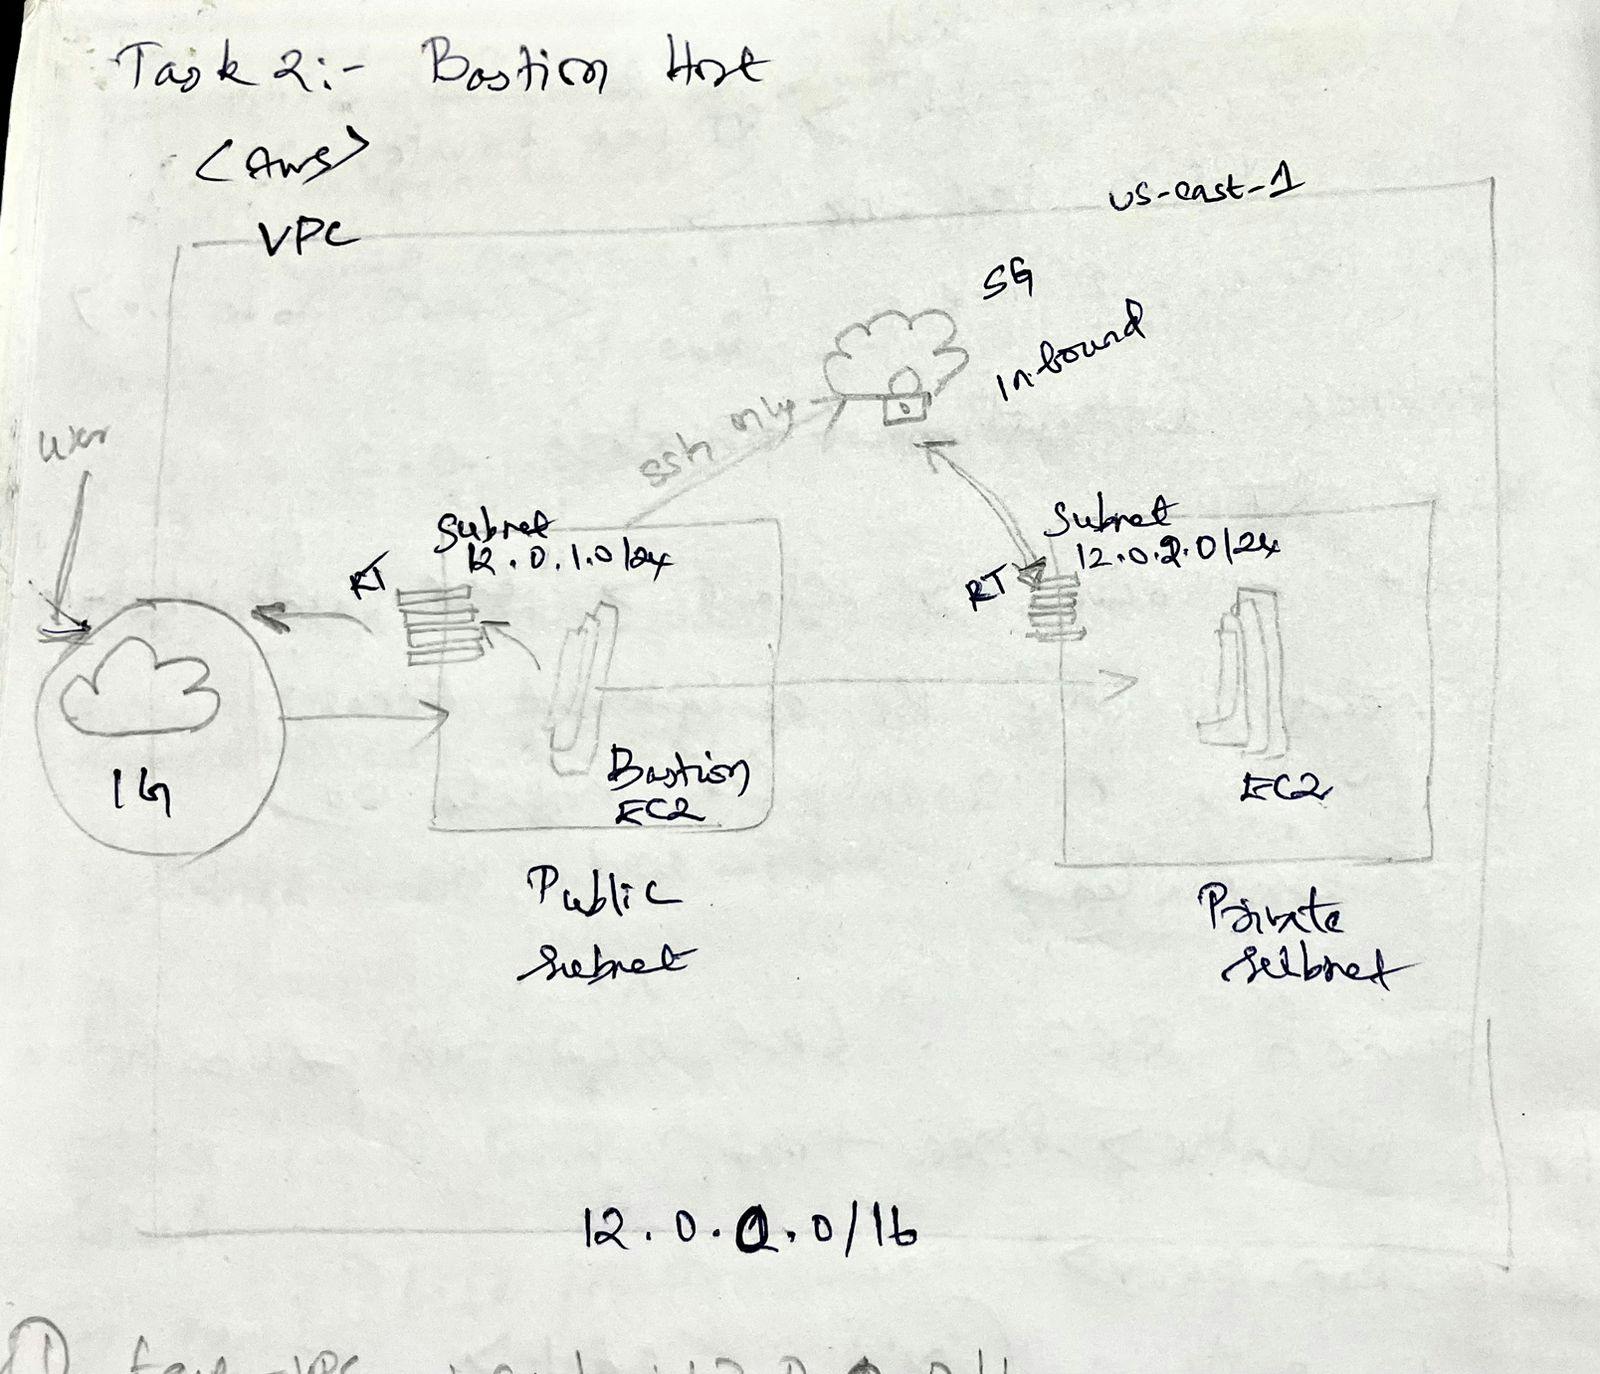
This guide outlines the steps to create a secure bastion host in your AWS environment, enhancing the security of your cloud infrastructure. Here, we'll establish a simple VPC with public and private subnets, mimicking a historical bastion's role in protecting internal resources.
Network Infrastructure Setup:
VPC Creation: Start by creating a VPC named
test-vpcwith a CIDR block of12.0.0.0/16.Internet Gateway: Create an internet gateway named
igw-testand attach it totest-vpc. This allows internet access for resources in the public subnet.Subnet Creation: Create two subnets within
test-vpc:Public Subnet: Name it
test-public-subnet-1awith a CIDR block of12.0.1.0/24in theus-east-1aavailability zone.Private Subnet: Name it
test-private-subnet-1awith a CIDR block of12.0.3.0/24in theus-east-1aavailability zone. This subnet won't have direct internet access.
Route Tables:
Create a route table named
test-public-RTand associate it withtest-public-subnet-1a.Add a route to
test-public-RTwith a destination of0.0.0.0/0and a target ofigw-test. This allows the public subnet to access the internet.Create another route table named
test-private-RTand associate it withtest-private-subnet-1a. No routes are needed here as this subnet is intentionally isolated.
Security Groups:
Create a security group named
test-ec2-public-instance-SGand add two inbound rules:SSH (port 22) from anywhere (0.0.0.0/0) - Caution: This allows broad access for demonstration purposes. Consider restricting access in production environments.
HTTP (port 80) from anywhere (0.0.0.0/0) - Caution: Similar caution as above applies.
Create another security group named
test-ec2-private-instance-SGand add one inbound rule:- SSH (port 22) only from the
test-public-subnet-1asubnet. This restricts access to the private subnet instances from the bastion host only.
- SSH (port 22) only from the
Key Pair Creation: Generate an SSH key pair for secure access. Download the private key and store it securely.
Launching EC2 Instances:
Launch an EC2 instance named
test-ec2-public-instance-bastion(bastion host) in thetest-public-subnet-1a.Choose an appropriate Linux AMI (e.g., Ubuntu Server) and instance type.
Associate the security group
test-ec2-public-instance-SGand enable public IP assignment.
Launch another EC2 instance named
test-ec2-private-instancein thetest-private-subnet-1a.Choose the same AMI and instance type as the bastion host.
Associate the security group
test-ec2-private-instance-SGand disable public IP assignment.
Accessing Resources:
- Bastion Host Access: Use the downloaded private key and the public IP address of the bastion host to connect via SSH:
ssh -i <path/to/privatekey> username@<bastion_host_public_ip>
Private Instance Access:
Copy the private key to a secure location on the bastion host.
Use the private key and the private IP address of the private instance to connect via SSH from the bastion host:
ssh -i <path/to/privatekey> username@<private_instance_private_ip>
Remember:
This is a simplified example for demonstration purposes. Production environments require stricter security measures like limited access and specific IP ranges.
Refer to the official AWS documentation for comprehensive guidance on securing your cloud infrastructure.
By implementing a bastion host, you create a secure entry point, enhancing the overall security posture of your AWS environment. This approach mirrors the historical role of bastions, providing an additional layer of defense for your valuable digital assets.